


What is Razorpay?
Razorpay provides payment-gateway services used by more than 30,000 merchants. The business accepts and validates Internet payments by credit card, debit card, online banking services, UPI, and digital wallets. Razorpay provides payments solutions that support different technologies like nodejs, PHP, etc. for web and android, react native, etc. for apps.
Razorpay API Key & ID
Firstly we need Razorpay API ID and Key for using the Razorpay payment gateway so, first of all, you need to create a Razorpay account and then go to the “Settings” section click on API Keys generate API Key, and download the .csv file.

Pages Structure
📦pages
┣ 📂api
┃ ┗ 📂payments
┃ ┃ ┣ 📜postTranscation.js
┃ ┃ ┣ 📜razorpay.js
┃ ┃ ┗ 📜verify.js
┣ 📂success
┃ ┗ 📜index.jsx
┣ 📜index.jsx
┗ 📜_app.jsx
Front-end Side Code
On the front-end section, there is nothing much I only add one button which says “Pay ₹5 Now” and after clicking the button Razorpay payment window initials. I am providing important and necessary code for more details check out the GitHub repo.
Add Razorpay Script
I am using NextJS so, I will use NextJS’s Script for loading the Razorpay script it helps to improve performance.
<Script src="https://checkout.razorpay.com/v1/checkout.js" />Create async inititePayment()
In this function, we are not doing anything advance the code given by Razorpay I just modified it for NextJS like we are using order api we will see the order api section in the backend section, and in options, we are providing Razorpay Key ID, amount, company details, customer details, order id (which we get from our backend section using Razorpay API), and callback_url. After when payment initials user will redirect to the given URL which is our website’s API section URL where we verify the payment using SHA256 encryption but this is only one part of the verification of payment and it is a temporary check the main verification will do in webhook process where we will get all information related to our payment like transaction timing, payment mode, etc.
const inititePayment = async () => {
    const orderRes = await fetch(
      "http://localhost:3000/api/payments/razorpay",
      {
        method: "POST",
        body: JSON.stringify({
          amount: "5",
          currency: "INR",
        }),
        headers: {
          "Content-Type": "application/json",
        },
      }
    );
    const orderDetails = await orderRes.json();
    var options = {
      key: process.env.NEXT_PUBLIC_RAZORPAY_KEY_ID, // Enter the Key ID generated from the Dashboard
      amount: orderDetails.amount, // Amount is in currency subunits. Default currency is INR. Hence, 50000 refers to 50000 paise
      currency: "INR",
      name: "Company Name",
      description: "Test Transaction",
      image: "https://example.com/your_logo",
      order_id: orderDetails.id, //This is a sample Order ID. Pass the `id` obtained in the response of Step 1
      callback_url: "http://localhost:3000/api/payments/postTranscation",
      prefill: {
        name: "Gaurav Kumar",
        email: "gaurav.kumar@example.com",
        contact: "9999999999",
      },
      notes: {
        address: "Rajasthan, India",
      },
      theme: {
        color: "#3399cc",
      },
    };
    var paymentObject = new Razorpay(options);
    paymentObject.open();
  };
Backend Side Code
Let’s see the backend section of our web app, so firstly we need to create an order route in api section for creating order_id in this project route for generating order_id is “/api/payments/razorpay”.
import Razorpay from "razorpay";
import shortid from "shortid";

export default async function handler(req, res) {
  var instance = new Razorpay({
    key_id: process.env.NEXT_PUBLIC_RAZORPAY_KEY_ID,
    key_secret: process.env.RAZORPAY_KEY_SECRET,
  });

  var options = {
    amount: req.body.amount * 100, // amount in the smallest currency unit
    currency: "INR",
    receipt: shortid.generate(),
  };
  instance.orders.create(options, function (err, order) {
    if (err) {
      return res.json({ success: false, error: err });
    }
    res.json({ success: true, id: order.id, amount: order.amount });
  });
}
After generating order_id then payment will initial in the front-end and after payment Razorpay will redirect to our callback_url you can also Handler Function but I use callback_url because I like this type of implementation. Our callback_url is “/api/payments/postTranscation”.
Callback URL Method:
<button id="rzp-button1">Pay</button>
<script src="https://checkout.razorpay.com/v1/checkout.js"></script>
<script>
var options = {
    "key": "YOUR_KEY_ID", // Enter the Key ID generated from the Dashboard
    "amount": "50000", // Amount is in currency subunits. Default currency is INR. Hence, 50000 refers to 50000 paise
    "currency": "INR",
    "name": "Acme Corp",
    "description": "Test Transaction",
    "image": "https://example.com/your_logo",
    "order_id": "order_9A33XWu170gUtm", //This is a sample Order ID. Pass the `id` obtained in the response of Step 1
    "callback_url": "https://eneqd3r9zrjok.x.pipedream.net/",
    "prefill": {
        "name": "Gaurav Kumar",
        "email": "gaurav.kumar@example.com",
        "contact": "9999999999"
    },
    "notes": {
        "address": "Razorpay Corporate Office"
    },
    "theme": {
        "color": "#3399cc"
    }
};
var rzp1 = new Razorpay(options);
document.getElementById('rzp-button1').onclick = function(e){
    rzp1.open();
    e.preventDefault();
}
</script>
Handler Function Method:
<button id="rzp-button1">Pay</button>
<script src="https://checkout.razorpay.com/v1/checkout.js"></script>
<script>
var options = {
    "key": "YOUR_KEY_ID", // Enter the Key ID generated from the Dashboard
    "amount": "50000", // Amount is in currency subunits. Default currency is INR. Hence, 50000 refers to 50000 paise
    "currency": "INR",
    "name": "Acme Corp",
    "description": "Test Transaction",
    "image": "https://example.com/your_logo",
    "order_id": "order_9A33XWu170gUtm", //This is a sample Order ID. Pass the `id` obtained in the response of Step 1
    "handler": function (response){
        alert(response.razorpay_payment_id);
        alert(response.razorpay_order_id);
        alert(response.razorpay_signature)
    },
    "prefill": {
        "name": "Gaurav Kumar",
        "email": "gaurav.kumar@example.com",
        "contact": "9999999999"
    },
    "notes": {
        "address": "Razorpay Corporate Office"
    },
    "theme": {
        "color": "#3399cc"
    }
};
var rzp1 = new Razorpay(options);
rzp1.on('payment.failed', function (response){
        alert(response.error.code);
        alert(response.error.description);
        alert(response.error.source);
        alert(response.error.step);
        alert(response.error.reason);
        alert(response.error.metadata.order_id);
        alert(response.error.metadata.payment_id);
});
document.getElementById('rzp-button1').onclick = function(e){
    rzp1.open();
    e.preventDefault();
}
</script>
postTranscation.js
import crypto from "crypto";
export default async function handler(req, res) {
const { razorpay_payment_id, razorpay_order_id, razorpay_signature } =
req.body;
const hmac = crypto.createHmac("sha256", process.env.RAZORPAY_KEY_SECRET);
hmac.update(razorpay_order_id + "|" + razorpay_payment_id);
let generatedSignature = hmac.digest("hex");
let isSignatureValid = generatedSignature == razorpay_signature;
if (isSignatureValid) {
// res.json({ sucess: true, razorpay_order_id, razorpay_payment_id, razorpay_signature })
//do something
res.redirect(307, "/success");
} else {
res.status(500).json({ sucess: false });
}
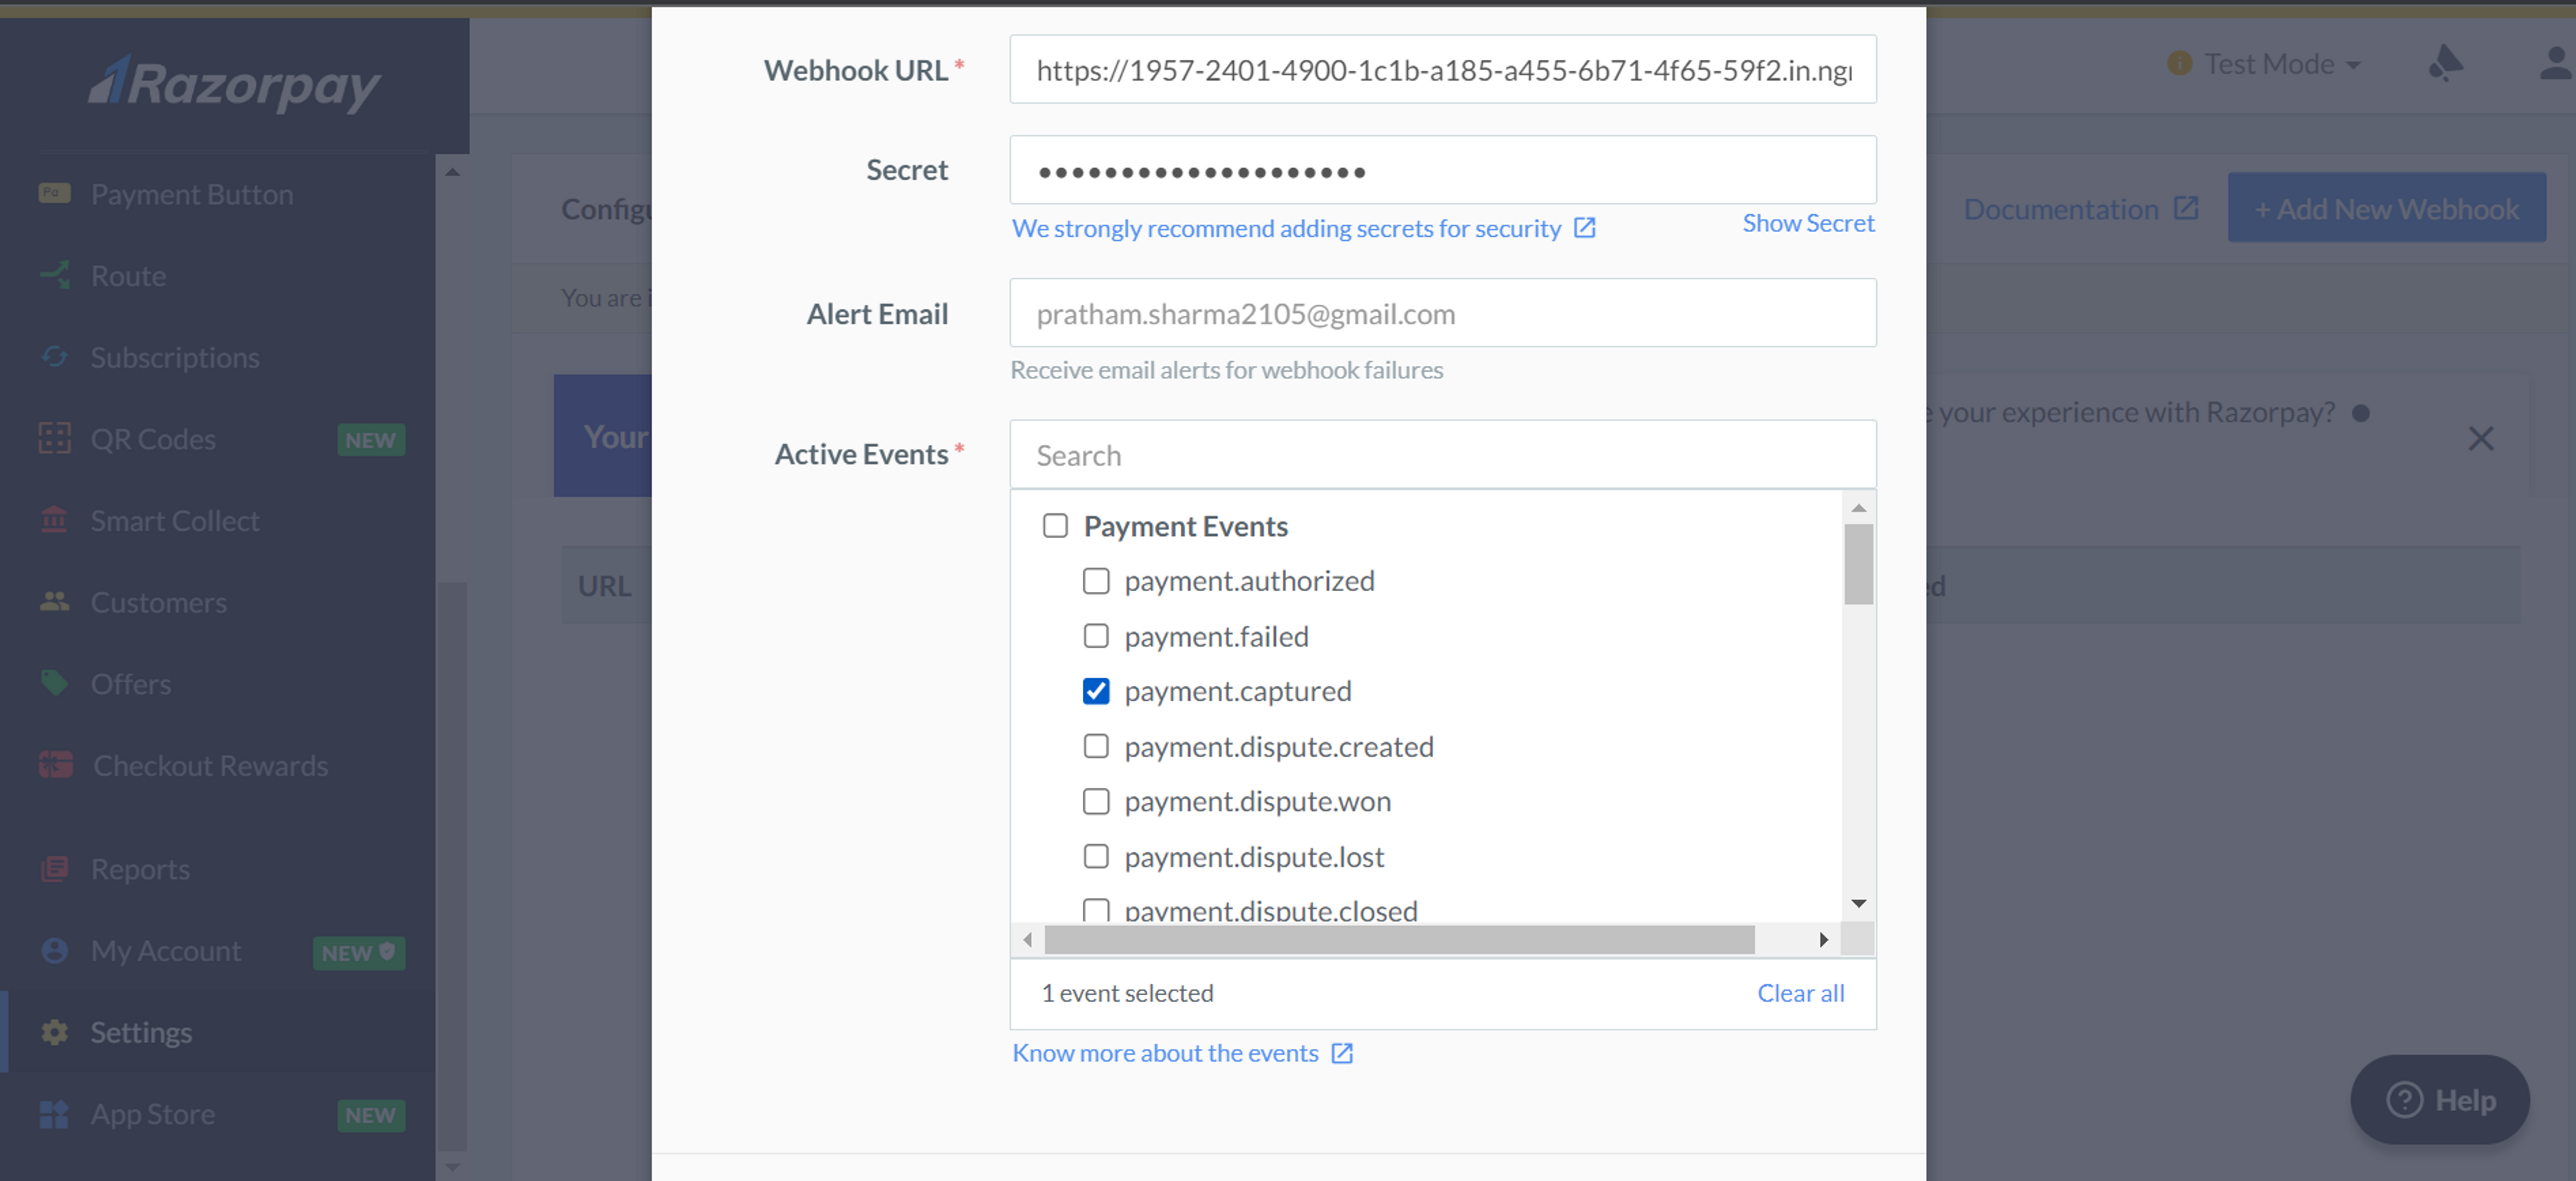
}This will redirect the user to the success page but this is not our main verification method for payments. The main verification for payments happens using Razorpay’s webhook. Firstly create Razorpay’s webhook with the webhook signature, give the webhook URL, and add the active event “payment.captured”.
NOTE: In this example, my verification code file is in /api/payments/verify.js so my webhook URL will be “https://www.hostname.xyz/api/payments/verify” there is no rule for creating a webhook route even though you can decide that you need to create multiple routes for payment success, failed, pending, etc. or verify in a single route.
Now after creating a webhook for capturing payments it’s time to creating verify.js
verify.js
import Razorpay from "razorpay";

export default async function handler(req, res) {
  const check = Razorpay.validateWebhookSignature(
    JSON.stringify(req.body),
    req.headers["x-razorpay-signature"],
    process.env.RAZORPAY_WEBHOOK_SECRET
  );
  if (check) {
    //save data in database and this data provide you payment status and payment details
    require("fs").writeFileSync(
      "paymentInfoData.json",
      JSON.stringify(req.body, null, 4)
    );
  } else {
    //Do something
  }
  res.json({ status: "ok" });
}
In this example, I am storing payment data in "paymentInfoData.json" but you can store necessary data in database like MongoDB, MySQL, etc. I will suggest you store only necessary data, not all payment data.
My Tip
My tip is to not use use “/” in notes or anywhere (means in Razorpay’s data like user’s details, notes, etc.) because in my case I face a problem in verifying "x-razorpay-signature" request header with the request body data both hash were different and when I removed “/” from my code this problem was gone.
If you like this article and find it helpful and informative then please share it with your developer friends. If you find any mistake in this article please share it with me you can connect with me from anywhere.
Hello

